| |
%20(Small)_small.jpg) |
|
| Raid Afrique of 1973 |
|
%20(Small)_small.jpg) |
|
| Raid Afrique of 1973 |
|
%20(Small)_small.jpg) |
|
| Raid Afrique of 1973 |
|
|
2CV - DYANE 6 -
ACADIANE - MÉHARI
Ground clearance Adjustments
The front and rear ride height should be adjusted to
the maximum allowed for the model concerned.
Tyres
The vehicles may be equipped with 125-15 X tyres in
the case of the 2CV and Dyane, and 135-15X or
135-15XZX in the case of other models, always fitted
with an inner tube.
The 135 section tyres give better performance on
sandy surfaces.
Inflation Pressure
(measured hot) |
Front
psi Bar |
Rear
psi Bar |
Spare
psi Bar |
Normal
Very Hard Going
(flints, rocks, potholes)
Earth, Firm Sand
Soft Sand |
26 1.8
32 2.2
18 1.2
9 0.6 |
28 1.9
32 2.2
18 1.2
9 0.6 |
29 2
29 2
29 2
29 2 |
Note: restore standard front and rear
operating pressures as soon as road
conditions improve.
Platform
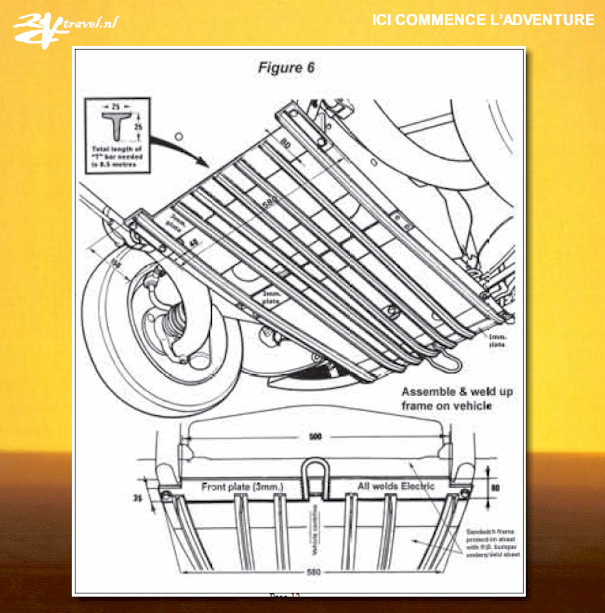
• Reinforce the platform as shown in fig. 7.
• Fit front bumpers and sump shield of P.0. type (refer
to table on Page 19).
• Fit a protective flaring under the engine and
gearbox, with a tow hitch at the front (fig. 6): you
should make this
yourself. Ensure that you leave openings for access
to the sump drain plug and the engine front mounting
bolts.
• Secure the front axle cross member with bolts
similar to those used for the rear cross member
(these bolt are longer).
Having reached this stage, one can proceed to the
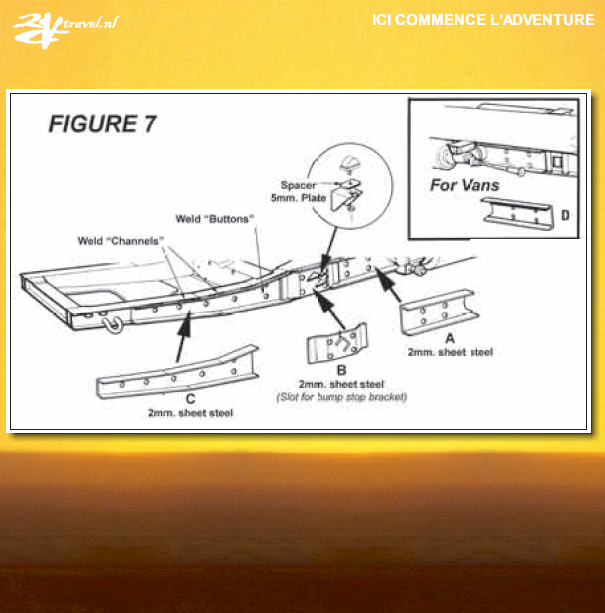
reinforcement of the platform chassis (fig. 7).
• For those vehicles (including P.O. versions) built
since December 1972, weld into place only the
reinforcement A.
• For vehicles built prior to December 1972, weld on
reinforcements A, B (place a 5 mm. spacer under the
stop) and C.
• For Vans of all types, additionally weld in
reinforcement D at the rear.
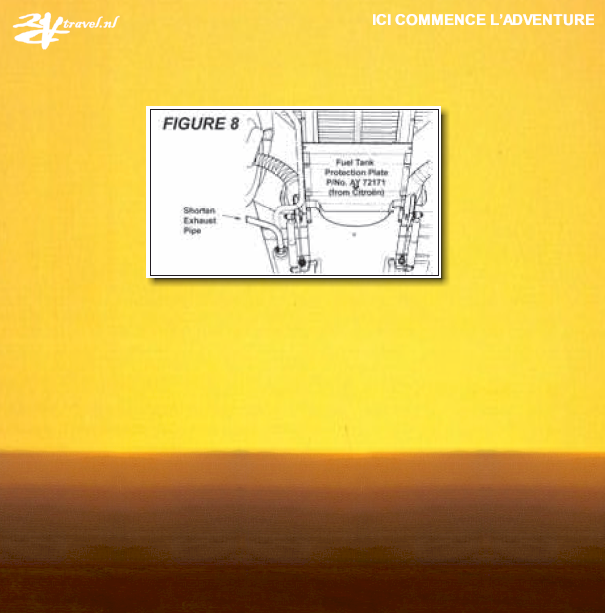
• Fit a protective under tray beneath the fuel tank
(fig.8)
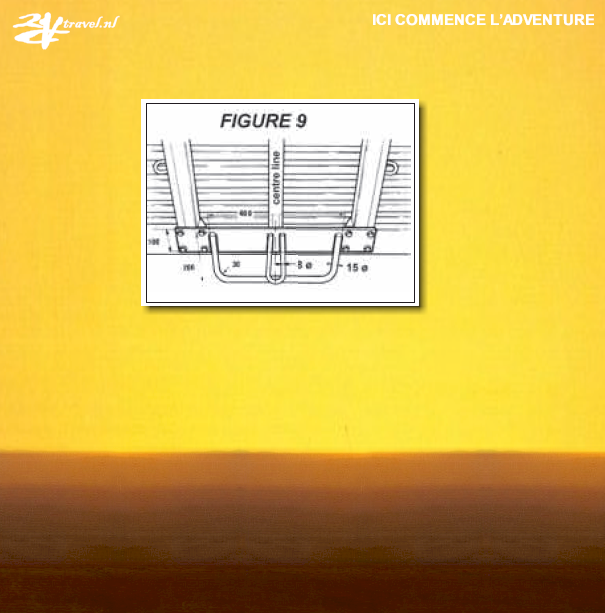
• Remove the rear bumper altogether and fit tow hook
(fig.9)
2cvTravel: Chassis
For the chassis there are 2 options. Either start of
with a replacement chassis that is made up from
tubes (such as the Wheels chassis or the 4x2
Barbour) or get a good original type one. Original
Mehari and Acadiane chassis always have some P.O,
strenghtening. When the original type one is used,
the following reinforcements can be made: (fig 7)
1: Reinforcement of the front chassis beam in front
of the front axle. Reinforcement C in the picture.
This is for reinforcing the front engine carrying
construction.
2: Reinforcement of the chassis beam between the
front axle and front spring tube carrier.
Reinforcement
A in the picture. This is for reinforcing the
suspension carrying structure.
3: Reinforcement of the chassis beam between the
rear spring tube carrier and the rear axle.
Reinforcement
D in the picture. This is for reinforcing the
suspension carrying structure.
4: Reinforcement of the front axle bolt retainers.
This is reinforcement B in the picture. This is for
reinforcing
the front suspension structure.
Exterior Fittings
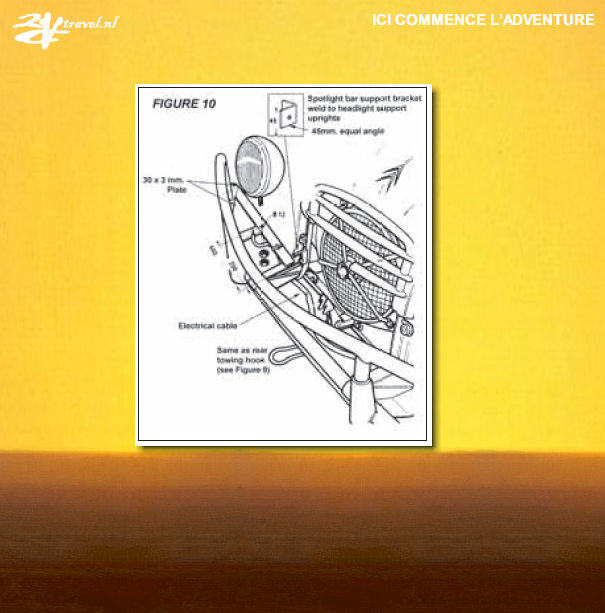
• Fit two long range auxiliary lamps served by
electrical relays (fig. 10)
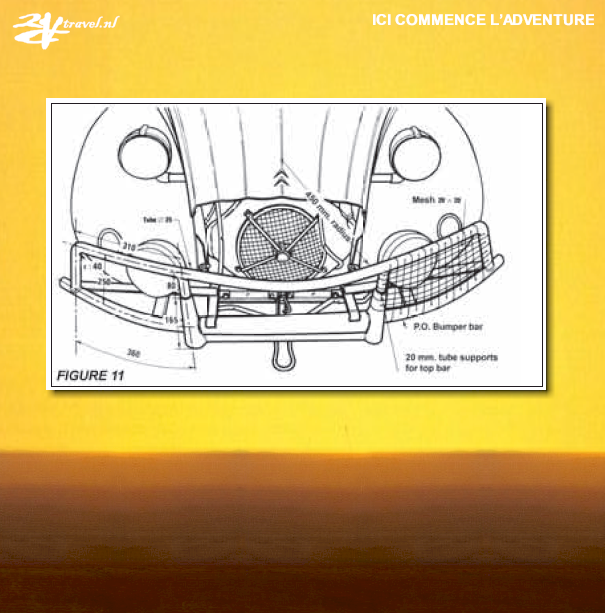
• Protective grilles can be attached to the P.O.
type front bumpers to protect these lamps (fig. 11).
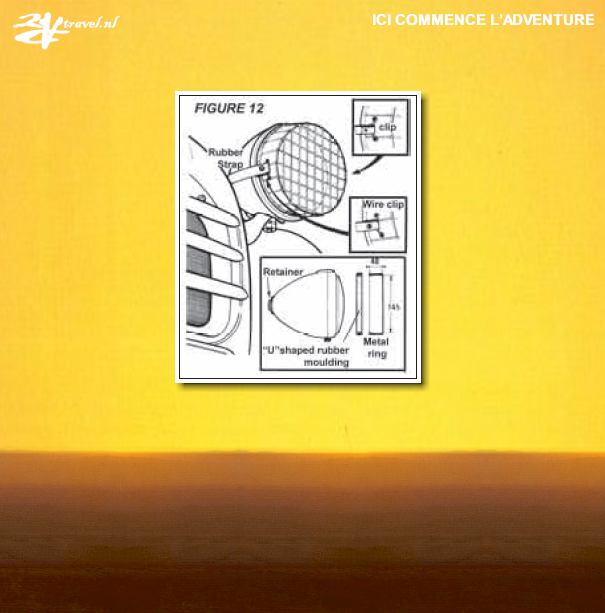
• Provide protection for the standard headlamps:
- in the case of round lamps, grilles must be made (fig.
12),
- in the case of rectangular lamps, a standard part
exists, reference ZC 9866078 U.
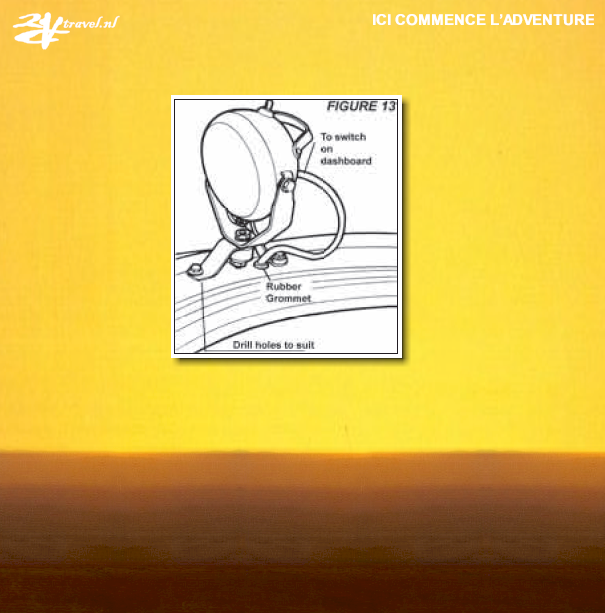
• Fit a swivelling police-type spotlight on the left
side, above the driver’s door (fig. 13).
• This lamp may be replaced by an inspection light.
• To assist in crossing soft sand, fit a rear hand
grip of the type used on the Citroën H and three
supports for
sand mats (fig. 14).
• We advise the use of two mats made of light alloy
or plastic.
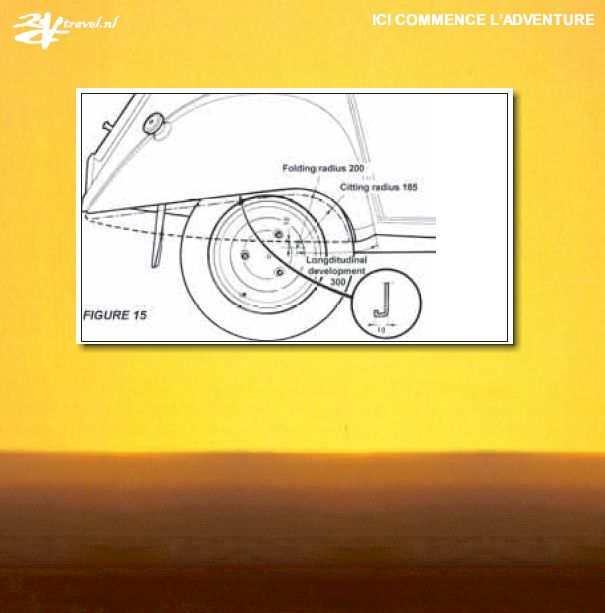
• Optional: shear off the rear wings (fig. 15).
|
|
|

%20(Small).jpg)
%20(Small).jpg)
%20(Small).jpg)